 |
 |
 |
 |
 |
|
Pet Portrait Gallery | Favorites Gallery | Norwegian Elkhounds | Fused Glass Gallery |
|
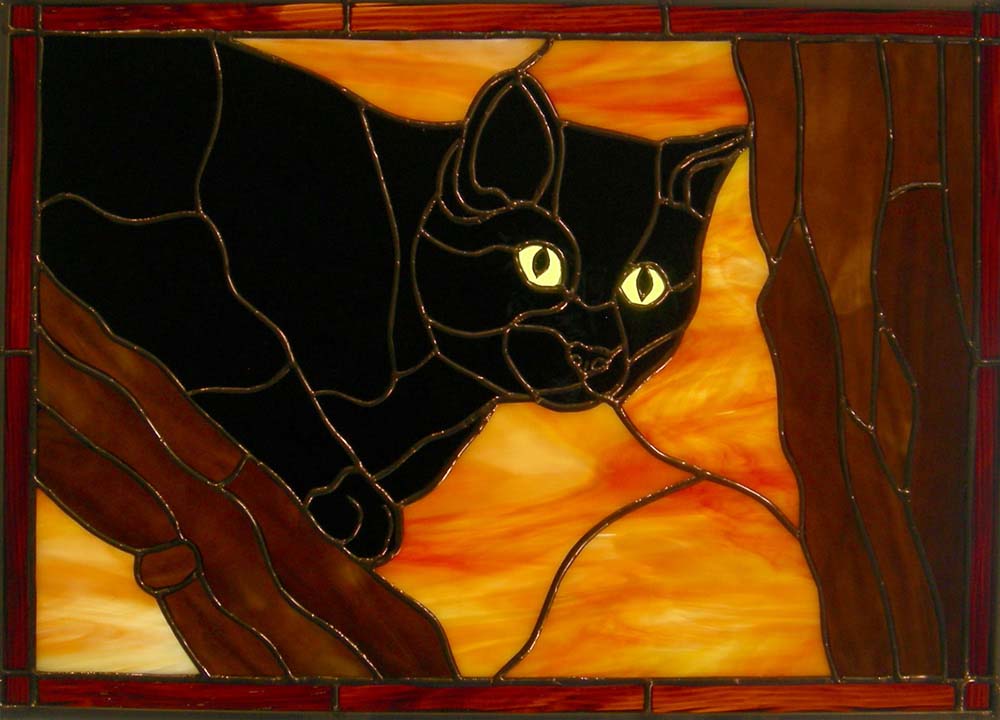
The inspiration for "Cat Burglar" came from one of my own cats. One day, I found her pawing through an opened jewelry box, intent on finding the spider that had taken refuge there, and she was having so much fun! She was a long-haired calico kitty, but the beauty of stained glass is that you can make the Cat Burglar look exactly like your own feline with the right choice of glass! "Cat Burglar" is a great project for personalizing a panel even further. Pull out all that old costume jewelry that you never wear anymore, or check out yard sales and thrift stores to put together a bunch of lovely "bling" for the kitty to paw through. Look for a variety of colors and components to add further interest. How about one really special piece to occupy the most prominent spot? Do you like pearls? Diamonds? Cloisonne? Put together a group of necklaces, earrings, pendants, brooches, or whatever else suits your fancy, to make this a truly unique one-of-a-kind panel. (I kind of doubt you will put real diamonds here, depending on your budget, but rhinestones make a wonderful substitute!) "Cat Burglar" is one of the many true-to-life patterns in my pattern book It's a Cat's Life. As a cat owner of many years, I love all the interesting things that cats do in an ordinary day, and those became the inspiration behind the wonderful poses in the book. I have a "library" of glass with almost every shade and hue of the greys, tans, browns, creams, and every other possible color combination available for rendering lifelike stained glass panels of pets and other animals, but I use Spectrum glass primarily. When you are choosing the glass for your "Cat Burglar", take the time to look through all the selections available to you to find just the "right" one -- it does make a difference! And once you have your glass, try to lay out your pieces to reflect the direction of the hair to get the most realistic rendition. Again, the attention to this sort of detail really pays off in the final panel.
1. Laying out the pattern and selecting the piecesYou will need two copies of your pattern. Lay out one copy on your work space, and label each piece. Set up a jig around the outside edges, measured carefully, to help prevent "creep" during the panel assembly. Without the jig, a panel always seems to get slightly larger as is it built. I use the Morton layout system, but you can make a very useful jig with just pieces of quarter-round with holes drilled through it for your push pins. Then, take the second copy of the pattern, and label each piece with the identical numbers. Before you cut it into individual pieces, mark pieces with an arrow to indicate which way you want the colors and/or textures to flow in the final piece. You will be using these cut-up pattern pieces to trace the outline of each piece, so it's handy to have the arrows right there on the piece. If you would like the pieces to be more durable, consider laminating them, or covering the whole second pattern with clear contact paper on both sides before you cut it apart.
2. Lay your pattern pieces on your glass.Pay close attention to the direction and flow of the colors in the glass � you can create wonderful effects in the final panel by using these features. For the cloth that the jewelry box sits on, I chose an Armstrong glass with a lovely mix of blues, greens, and white. Since I didn't want too much of the white, I had to rearrange the layout of the pieces several times before I got it right. Notice too how I planned the flow of colors to give the appearance of folds in the cloth. With the glass for the cat, lay out your pieces so that they reflect the flow of her hair. Think too about the lighting depicted as coming through the window behind her. See how the greys are lighter on the cat's shoulders and neck, and darker on her tummy? All examples of how you can make the glass work for you!
3. AssemblyCut out the pieces, and use a Sharpie to label each with its number. Using a strip cutter for your border pieces will ensure that they are identical widths. Grind, fit, and assemble all the pieces for the panel. Make sure that, when you are finished with a piece, it is clean and dry, and has no grinder dust residue on its edges. For the most attractive foil lines in the finished panel, try to cut and grind the pieces so that they meet evenly and flush with surrounding pieces. Ideally, there should just be enough "wiggle room" that you can pick up any given piece without it binding anywhere. Don't worry yet about the final "fine-tuning" grinding though; you will do that when you are foiling. Be sure to save all the paper pieces that show an overlay, for example, the paws, eyes, and window frame. You will need them later.
4. FoilingIf you plan to patina your solder lines, use the appropriately-colored foil. For example, if you intend to make the solder lines black, use black-backed copper foil tape. Depending on the thickness of the glass, use 3/16" and/or 7/32" copper foil to foil each piece. Be sure that the piece you are foiling is dry and free of dust residue on the edges, or the foil won't stick. This step is where a panel is most apt to enlarge itself, so stay inside that jig! If a piece seems just too large to fit comfortably, grind the edges until it does. You would not think that such thin foil tape would make a difference, but it does, so expect to have to do some adjustments. And foil one piece at a time and fit it back in the panel, because its slightly new dimensions will affect how the surrounding pieces fit. Many artists begin foiling at one corner and work toward the opposite. I do it a bit differently. Start with the central features of the panel, in this case the cat and the jewelry box. That way, if any significant adjusting has to be made for everything to fit nicely, it can be done on the background, where it is usually easier, and where the small detail is normally not so important. Then, foil the background, and here I do generally work from the lower left to upper right corners. Finally, foil the border pieces. When you foil the border pieces, be sure to leave the outside edge without foil. It will be sliding inside the zinc came, and if there is foil on that edge, it will show. Do any additional minor grinding to ensure that all pieces fit as snugly as possible. Remember, "snug," but not "tight."
5. The OverlaysAfter all the pieces are foiled, it's time to do the overlays. The overlays add a great deal of detail to the jewelry box, the cat's paws, and the window frame. By using overlays, you avoid trying to cut impossibly small, thin pieces, and also make the paws, nose, and eyes very realistic. To do the overlays:
6. SolderingWhen all pieces are foiled and fit into the panel and the overlays are done, flux all the foil lines, being especially careful of those precious overlays. Lay down the flat ("tack") solder on the panel front, carefully pick up the panel, turn over, and apply the flat solder to the back. Then lay down the bead solder. Turn the panel over again and add the bead solder to the front. Remember that your soldering iron is hot enough to break glass if used in the same spot for too long, especially if the piece is a small one. If one line is giving you trouble, move on to another place and give the glass time to cool off. Having to remove and replace a broken piece at this point is not a fun job! Take particular care when soldering the overlays. Apply flux gently, being careful not to brush "against the grain" and pull up an overlay. Make sure your iron tip is clean, and use the corner of the tip to take a bit of solder and just lightly touch it to the overlay. The solder will run quickly over the overlay. You need to work quickly, or the iron's heat will lift up the overlay. If this does happen, and it frequently does, you will need to start over. When the entire panel is soldered, add the zinc came frame pieces, solder all junctions of the came, and wherever the came and foil intersect, front and back. Solder a Handi Hanger into the came at both top corners. You can then attach a length of chain for hanging the panel. Carefully clean the panel and apply the patina if you want it. I chose not to patina the panel in the photos so the lead lines showed up clearly, but a nice black patina would look very nice here. An old toothbrush makes a great patina applicator. Be very careful not to scrub patina on the overlays; apply it gently, perhaps using a paint brush.
7. CleanupOnce all the soldering (and the patina) is done, thoroughly clean both sides of the panel. Allow it to dry completely. (Watch out for those overlays!) If any glass paint needs to be applied, for example the black for the eye's pupil, do that, and allow it to dry for a couple of hours. Check for any burrs or sharp points in your solder. If you find some, apply a bit of flux and touch up with the iron. Then clean that spot thoroughly. Use a good quality glass polish like Liva or Kem-o-Pro to polish the panel. Apply, allow it to dry, then buff and wipe, using several pieces of clean paper towel or soft rags. For detail work, use a pencil point covered with paper towel to get into those spots. Take extra care not to damage the overlays -- wipe, don't rub them.
8. The "Bling"Once the panel is completed and clean, it's time for some fun! Let's add the bling! First, assemble your collection of potential costume jewelry pieces for your panel. Then, play around with them on the panel, laying pieces where they might look good. Take your time and try various combinations until you have a good selection scattered "inside" the jewelry box, hanging over the edges, and scattered on the cloth. Maybe even use a short piece of a necklace or bracelet to make a collar for the kitty. Once you have your selections, take wire cutters or some such tool to snip off any clasps, earring backs, or anything else that keep pieces from lying as flat as possible. Cut any chains to proper lengths. Clean any pieces that need it. You will have to glue, rather than solder, the jewelry pieces onto the panel, as most costume jewelry does not have solderable metal in it. Use a quality glue specifically for glass and beads. I recommend either Hammer Head's Glass Bond glue, or E-6000. Both are very strong, do very well with slick surfaces like glass and plastic, and will dry clear. Use a toothpick to spread a bit of glue on the places where a piece of jewelry will make contact with the panel (either on solder lines or the glass itself), and put the jewelry piece in place. Add the other pieces until you have everything where you want it, and let everything dry overnight. Next day, check to see if anything needs any additional glue, and trim away any excess dried glue with an Exacto knife. And, you're done!
*You will need fairly good-sized pieces of glass for these because of the enormous variation in colors and their distribution.
Article and photo © 2014 Robin Anderson
|
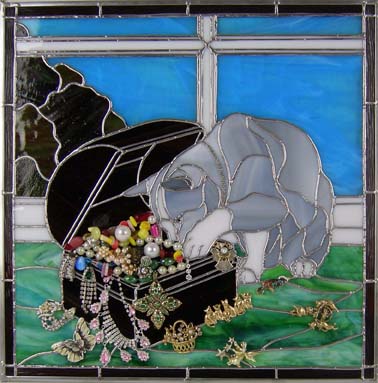 Cats are ruled by their curiosity, it seems. Ever heard the expression "Curiosity killed the cat"? Well, this lovely kitty has gotten into her owner/servant's jewelry box to search for the perfect accompaniment for her rhinestone collar, and she clearly plans on looking at every piece. But did you also know the rest of that quote? Most people don't. It says "...but satisfaction brought it back." Hopefully this cat burglar will find that piece of jewelry to complete her ensemble and be a most-satisfied feline!
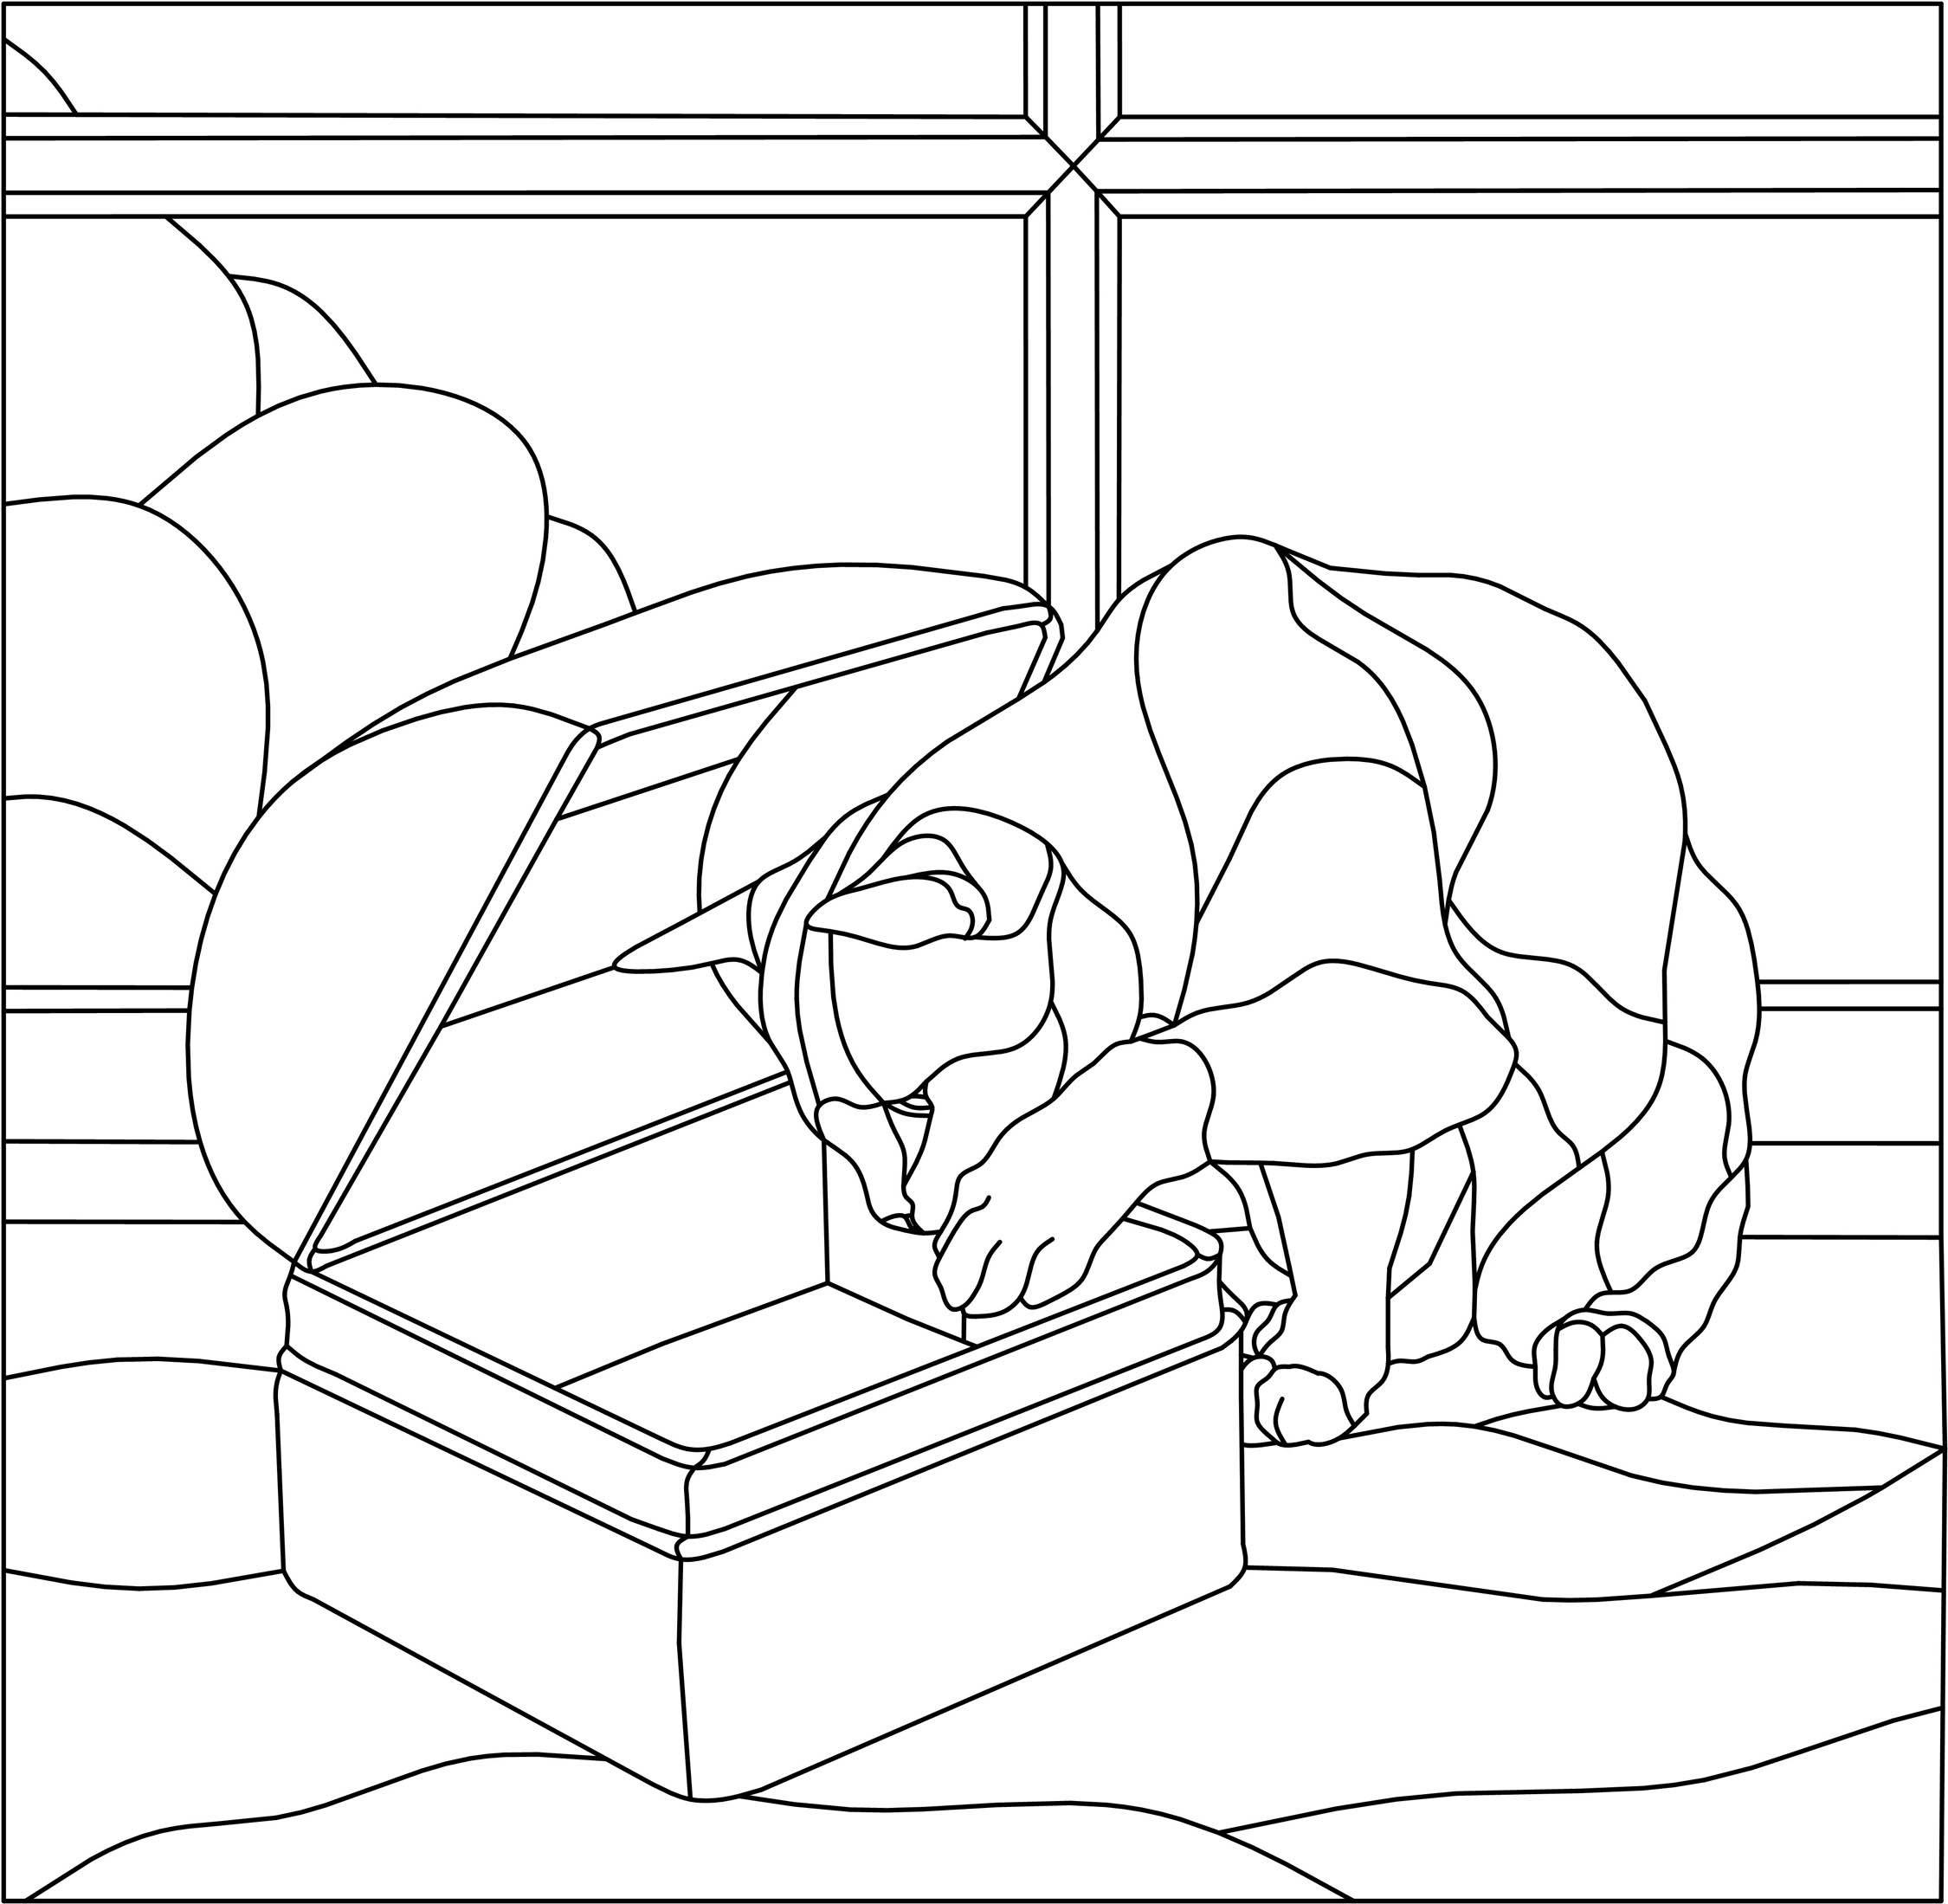
 |
|